HedgeFlows connectivity supports Sage 50 accounts (UK) for versions from 2018 onwards (v24+). This is in line with Sage's software lifecycle policy. We support versions 24, 25, 26, 27 of Sage 50c Accounts Standard & Professional.
As Sage50 is a desktop application, we need to install a Sage 50 Connector program on the machine where you use Sage50.
Before starting the installation process, we recommend creating a separate user in Sage50 that you can allocate to HedgeFlows to access your data. A separate step-by-step guide explains how to create the user and the settings we require here.
Please follow the steps to connect HedgeFlows to your system:
-
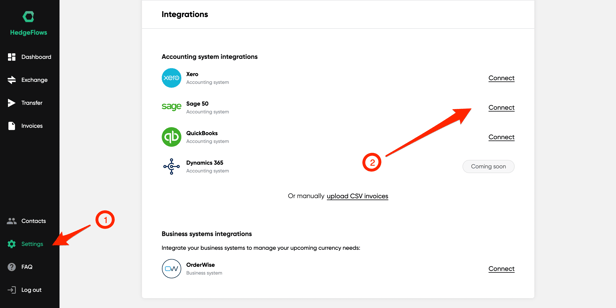
Select the "Connect" button for Sage 50 from Settings>Integrations section:
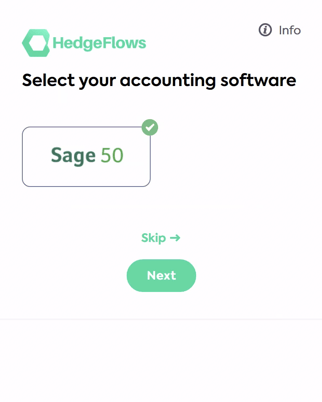
2) Select Sage 50 in the Pop-up window
You will see a popup window with a choice of accounting software to integrate - confirm Sage 50 by selecting the icon:
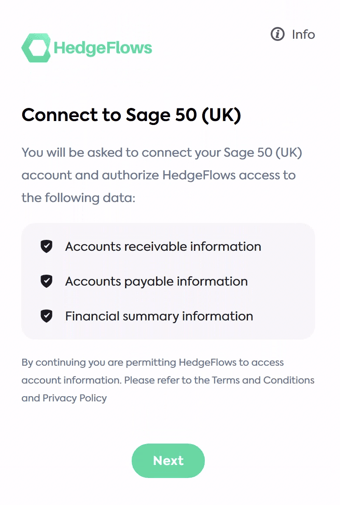
3) Review the high-level data we would be accessing from your Sage50
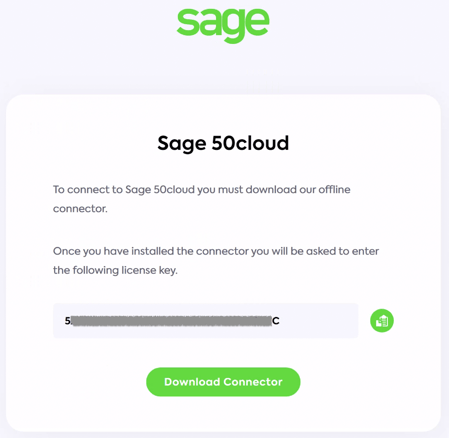
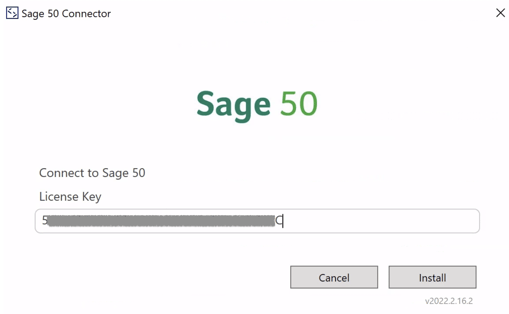
4) Copy Licence Key and download the Connector
-
-
Copy and save the Licence key - you will need it shortly to set up the Connector.
-
Next - download the Connector to install. Do not close your browser.
-
5) Install the connector
Locate the downloaded Connector file (in your Downloads folder or elsewhere where you chose to save it) and open it. You will be asked to input the License Key to start the installation:
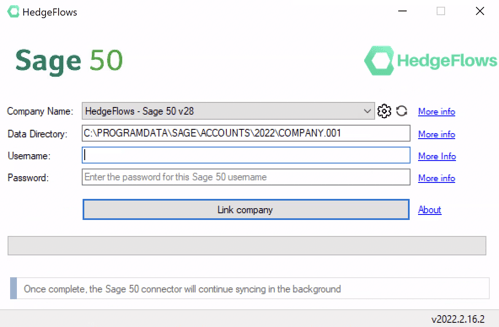
6) Choose the correct Company for Sage50 data and enter UserName and password.
The Connector installation wizard will ask you to choose Sage50 Company Name to link and Sage50 Username and Password to authorise the connection. We recommend creating a separate user in Sage50 that you can allocate to HedgeFlows in order to access your data. A separate step-by-step guide explains how to create the user and settings we require here.
7) Complete setup
Once you have successfully linked the company, you will be redirected back to HedgeFlows screen to review and finish the connection:
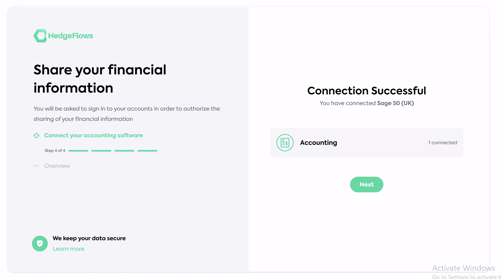
Once confirmed, the connection is active. It may take a few minutes for the data to start appearing on your Invoices page. If you don't see anything after 5 minutes, please contact support@hedgeflows.com